
In an era when gaming has started embracing accessibility options more and more, it’s rather odd that some games don’t feature fully customizable controls. If you’re playing games on your Nintendo Switch, though, you’re in luck because the console actually allows you to remap your controller at the system level. This means you can fully customize your controller’s button layout in a way that suits your playstyle or accessibility needs rather simply by following just a few simple steps in this guide.
Nintendo
How to customize controller layout on Switch
You can remap the controls of the two included Joy-Cons, a Switch Pro Controller, or the buttons of a Nintendo Switch Lite. Here’s how.
Step 1: Select System Settings on your Nintendo Switch home screen.

Step 2: Scroll down to the Controllers and Sensors tab, then select Change Button Mapping on the right.

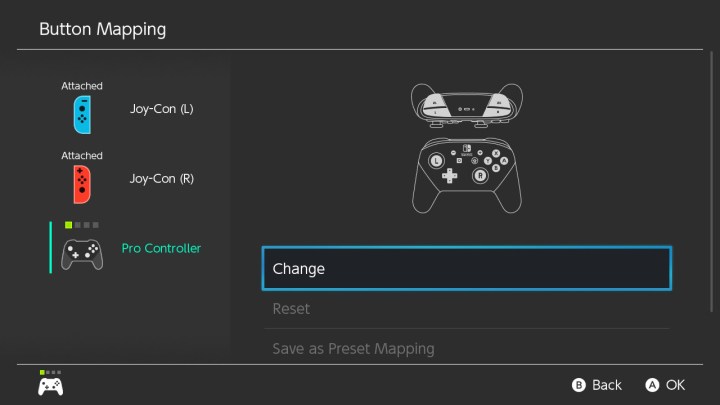
Step 3: In the next menu, you can choose which controller you’d like to remap, then select Change on the right. Note that you can return to this screen and reset your controller to its default mapping at any time.
Step 4: You can now change the mapping of each button on your controller to best suit your needs. When you’ve made your changes, click Done to apply them.

Editors’ Recommendations
