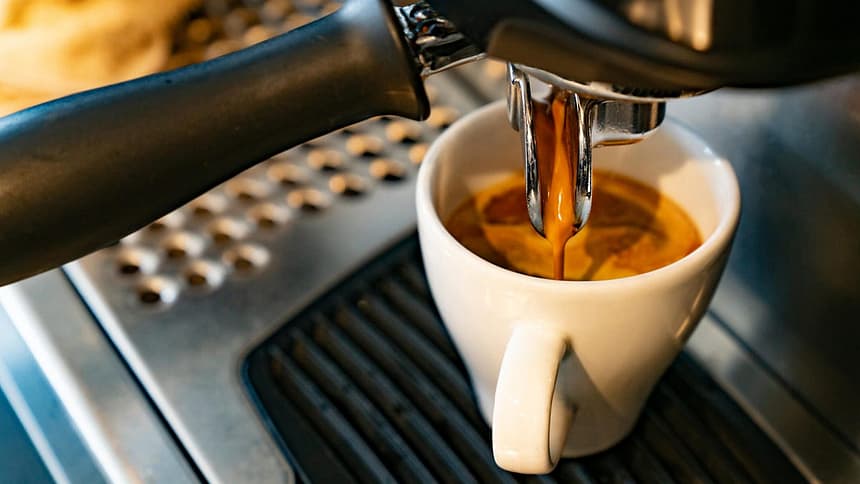
Espresso is one of coffee’s fussier forms, but advocates for the pressure-brewed beverage know that it’s worth every bit of effort to get that creamy, flavorful result.
Coffee professionals tout the golden ratio for making perfect American-style drip coffee. Espresso has its own measurements, and getting them right is key to making coffee-house-quality shots at home.
You don’t need a wildly expensive espresso machine, either, since espresso is largely about technique. If you hone your measurements and brewing skills, you can pull high-quality shots, even with a basic model.
When it dawned on me that I’d been winging it or simply relying on factory presets for espresso measurements, I decided to task an expert about the nuances of brewing espresso at home. And, specifically, exactly how much espresso should go in a single shot.
Kaleena Teoh is a coffee educator and the co-founder of Coffee Project New York. She generously shared her thoughts, tips, and common mistakes to watch out for when packing pucks and brewing espresso.
Espresso basics
Splurged on an espresso machine? Make sure you’re getting the most out of it with these essential tips.
“The word ‘espresso’ itself is not just a drink, it’s actually a brewing method that involves pushing hot water through a compacted puck of coffee,” Teoh said, which can be accomplished through a machine with a boiler, or manually, as in a stovetop espresso pot. It requires a specific pressure and temperature calibration, but a high-end machine isn’t necessary.
“The two most important things are the machine’s ability to maintain pressure and temperature as you pull the shot,” she said. In most home-use models, you may not be able to make any adjustments, but gauges or displays that indicate pressure and temperature can be reassuring.
Ensure you’re closely following the manufacturer’s process, which may include preheating the water before brewing. Ensuring that your espresso machine is clean is also essential for quality control, as regularly brushing grounds from the portafilter loading point and periodically flushing it with hot water are crucial steps in maintaining optimal performance.
1. Mind the grind size
Finely ground coffee beans are essential for proper espresso.
Because espresso is a process, not a drink, there’s really no such thing as espresso beans, and you can choose a provenance and a roast that suits you for espresso, even a light one. The grind of any beans you choose significantly affects the outcome of the shot you pull.
“The grind size should be around the range of fine sand,” said Teoh, which is smaller than that used for drip coffee, French press or pour-over, but not as fine as the powder used for unfiltered brews such as Turkish coffee. This element makes it all the more important to have a grinder that lets you fine-tune the grind size with a dial, rather than just a few predetermined settings that may not provide the necessary nuance.
More so than the coffee machine itself, Teoh recommends another crucial piece of equipment for the best home-brewed espresso. “If you have a basic machine that can maintain pressure and temperature, that’s good enough, but if I have extra budget, I would spend it on a grinder,” Teoh said. “Having a good grinder, especially a good burr grinder, is very, very important for espresso.”
Teoh also naturally recommends the freshest coffee beans for the best espresso. Grinding to order is great, but you’re also looking for beans that have been as recently roasted as possible, ideally within a matter of weeks.
2. Nail the coffee-to-water ratio
Just like drop coffee, espresso has its own golden ratio.
The “golden ratio” differs for espresso compared to drip coffee, French press or pour-over, as you generally have limited control over the amount of water that goes into the brew. Instead, you’re looking for a specific ratio between the amount of grounds and the amount of liquid coffee that comes out, and yes, professional baristas weigh the finished espresso to ensure quality.
Despite what marketing language would have you believe, there’s no difference between coffee and espresso beans.
“The coffee to water ratio is between 1 to 1.5 and 1 to 2.5, meaning that, for every one gram of ground coffee we put in there, we want to yield between one-and-a-half to two-and-a-half grams of liquid espresso in the cup,” Teoh said. “That ratio usually gives you a pretty good, what we call ‘strength.’ It wouldn’t be too intense. It also wouldn’t be too watery.”
For the sake of easy calculations while you’re experimenting with these ratios, 1-to-2 is an average range to aim for. The smaller the ratio between grounds and liquid espresso, the stronger the coffee.
Ideal coffee to water ratio
| Water | Coffee |
|---|---|
| 2 oz. | 1 oz. |
| 3 oz. | 1.5 oz. |
| 4 oz. | 2 oz. (double shot) |
If your espresso machine has controls to adjust coffee strength, experiment with them. If not, other factors that you can control, which can affect the outcome in terms of the ideal ratio, are the grind size, consistency, and pressure of the puck.
3. Properly prepare the puck
Use your finger to gently level the grinds.
After measuring your grounds into the portafilter, based on its size and the manufacturer’s recommended measurement for a single or double shot, level it before tamping. “Use your fingers to ensure that it is distributed evenly before you tamp down,” Teoh said, so you don’t end up with an uneven puck.
She said that water will always look for the path of least resistance between the tank and your cup, so if there’s an area in the portafilter that contains a smaller or less pressurized volume of grounds because it was uneven to begin with, that’s where the water is going to primarily go, resulting in an improper extraction.
Read more: I Tried a $140 Espresso Machine That Pulls Creamy Shots and Is Slimmer Than a Blender
A heavy, high-quality tamp should be applied, sized correctly for your portafilter. Portafilters come in various sizes, typically 51 or 54 millimeters in diameter for home espresso machines. You’ll want to upgrade if your machine didn’t include a tamper or used a lightweight plastic one.
Your puck should be level and smooth before pulling a shot.
Tamping the puck doesn’t involve applying extreme force, but “you will want to push down to a point where you feel like it’s pushing back,” Teoh said. “You’re not using your whole body weight on it, but it’s also not like stamping a card. You want to push down and create a dense, tightly packed puck.”
If you want to be precise about pressure, some guidance suggests applying between 20 and 30 pounds. Teoh also notes that spring-loaded tampers are available, making it easier and more consistent to apply adequate pressure.
4. Taste and adjust
The golden ratio is a good place to start, but don’t be afraid to adjust if the flavor doesn’t suit your taste.
It’s your espresso, so it’s your palate that matters most for the outcome. Slight variations in the coffee’s freshness and roast, grind size, measurement of the grounds, tamping pressure and consistency, and temperature — to the degree you can control them — will all affect different outcomes.
Experiment with the above adjustments to achieve a balanced brew with a nice mouthfeel and length to its flavor, until it suits you.
“You might not be experienced making espresso, but you’re experienced as a consumer,” Teoh said, “so you know what you should be tasting in your cup, and if it’s not right for you, then you know that something needs adjustment.”
Given all the possible variables above, hopefully it’s just a matter of tweaking a few things rather than needing a whole new system.
How important is crema?
Crema is less about flavor and more about mouthfeel.
The crema, or foam layer on top of your shot, may be desirable. Still, it isn’t necessarily an indicator of a correctly pulled shot, nor does it significantly affect the flavor.
Teoh said that carbon dioxide is trapped in coffee beans during roasting, then released during brewing, creating the foamy crema. However, it isn’t the puck’s density that determines whether it appears during brewing.
“Your crema is not just CO2, but it’s also oils and insoluble matter in coffee,” Teoh said. “There are a lot of aromatic compounds in there, but the actual flavor of your coffee lies in the darker liquid at the bottom. The crema doesn’t really carry a lot of flavor, per se, but it does help with mouthfeel.”
The absence of crema may have less to do with the mechanics of the shot and more to do with the roast itself. “The freshness of the coffee makes a difference,” Teoh said, “and some coffee, if it’s roasted really lightly, will also not have a lot of crema.”
To maximize your crema potential, you’re looking for beans from a darker roast that were roasted recently.
